The Modal Box element of the UAVC allows you to display a popup based on various actions. In this article we’ll see how to trigger a popup on the click of a WordPress Menu element. You can do this using a custom CSS class.
Here are a few steps you need to follow:
1. Create a new section and add a Modal Box inside it. You can design the modal popup as per your requirements.
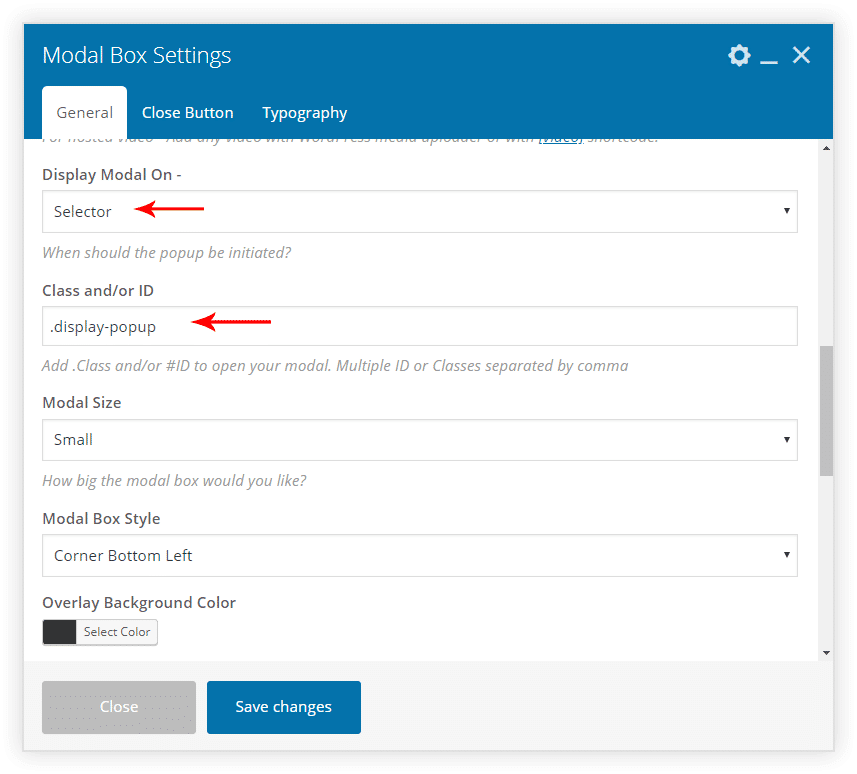
2. Open General tab of the Modal Box element. Select the Display Modal On -> Selector option.
Add your custom class name in the field as shown below.
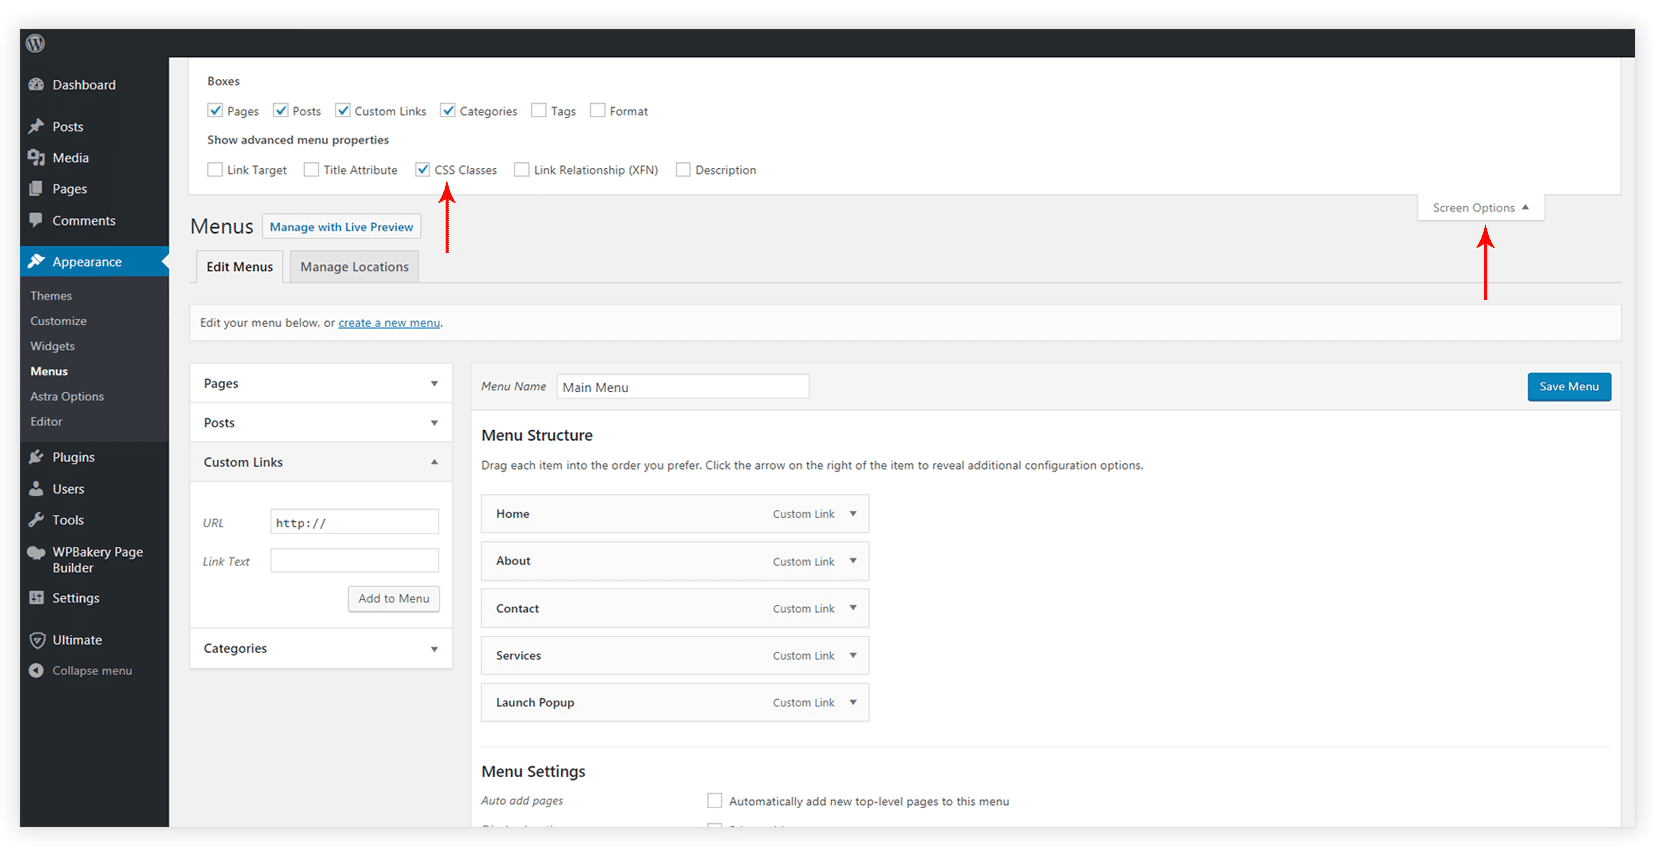
3. Now go to your WordPress Dashboard -> Appearance -> Menus
4. Create a Menu element on click of which you wish to trigger a popup.
5. Enable the CSS Classes option under the Screen Options settings.
6. Add the respective CSS class name ( the one you entered in step 2 ) under the selected menu element.
Also, select the location you wish to display the menu element on. Like we’ve selected Primary Menu in the screenshot below.
7. Open a page where you have used Modal Box and try to trigger the Popup from the menu item.
By default, this popup is triggered only on a single page. If you wish to trigger this popup on the entire website and make it work with all your themes, follow the steps mentioned below.
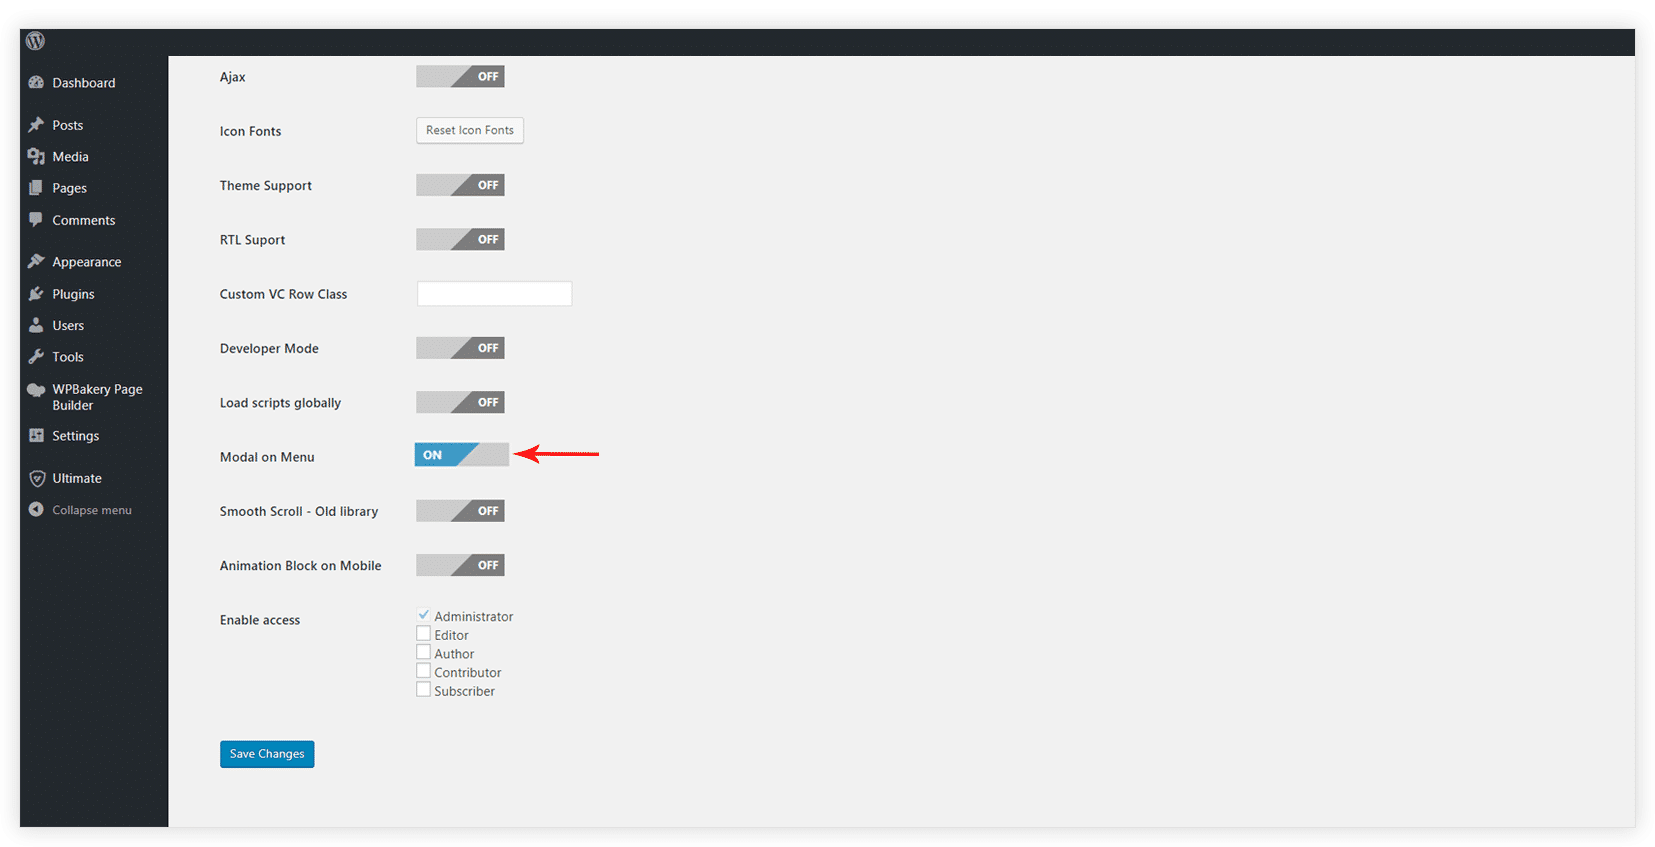
1. Go to Ultimate Addons debug settings.
2. Turn ON – Modal On Menu option.
3. Paste the following code into the functions.php file of your theme/child theme.
[pastacode lang=”php” manual=”function%20ultimate_VC_modal_popup()%20%7B%0Aecho%20do_shortcode(%20’%0A%0A’%20)%3B%0A%7D%0A%0Aadd_action(‘wp_footer’%2C%20’ultimate_VC_modal_popup’)%3B” message=”” highlight=”” provider=”manual”/]
Please make sure you have added shortcode according to your requirement(The above shortocde is an example). Also, You just need to replace your-saved-css-class with the CSS class that you entered with Modal Popup Box in Step 1.
This assures that the modal popup you just created, will be displayed on all the pages of your website!


